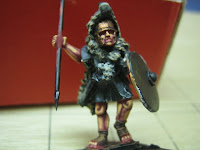
I paint almost exclusively in enamels - Humbrol. Enamels suit my style which, to be pretentious, I call 'deliberate caricature'. Deliberate, because I tend to apply paint where I wish it to stay. Caricature because I use paint to extenuate the sculpting of figures; so that the detail stands out from a good distance.
Although this post will not teach you how to paint figures (this only comes with considerable practise and experiment) it will show you how I go about painting a typical batch of figures - in this case 48 Roman velites to form four units of 12.

Having cleaned up the figures, attached shields and javelins, and stuck them to pieces of card (50mm x 20mm) I spray them black.

Having cleaned up the figures, attached shields and javelins, and stuck them to pieces of card (50mm x 20mm) I spray them black.


The back of shields are a pain if left until last so I paint these first. I paint them white then wash with brown acrylic ink. Once dry I painted the shield strap and around the arm, along with the sandals in dark brown.


It is a good thing to get any dry brushing out of the way early so next came the wolf skin. This was painted dark grey, dry brushed in two tones of light grey and then washed with diluted brown acrylic ink. Once done I picked out the eye sockets in dark grey, and the nose (along with the helmet underneath) in black. Then I dry brushed the helmets with bronze. I also dry brushed the sandals with a medium brown.


Next came the flesh tones. First all flesh areas were painted wine red. Next the flesh was over painted in a flesh tone mixed with wine red to bring out the muscles, bones, etc. Then, using neat flesh tone I did the final highlight.
I want my velites to wear a tunic of various 'random' colours - white, red, blue, yellow and green. Nothing I do is random, so I now sorted the figures into mini batches so that each upcoming unit would have a 'random mix' of colours by pose (note that all of the mini batches are divisible by 4 - the number of units).
I paint all cloth using the same technique. The shots above show my white. Starting with a dark tone (in this case a stone tone) followed by the first highlight (stone tone mixed with white) to pick out the major folds, then pure white to pick out the tops of the folds.


Next I painted the scabbard, belt, javelin around the hand and sword hilt dark brown. Whilst this was drying I dry brushed the bosses of the shields with aluminium.


Next came the leather and wood. Painted first with a deep tan, then light sand. You will have spotted the pattern by now. Everything is built up using three colours.

When I get the pure black out I know I'm near the end. I use this to go round where all metal touches something else or where there is a significant 'crease'.


Then I highlighted the bronze metal bits in neat gold.


When I get the pure black out I know I'm near the end. I use this to go round where all metal touches something else or where there is a significant 'crease'.


Then I highlighted the bronze metal bits in neat gold.


