Showing posts with label Crusades Project. Show all posts

Somewhere in Anatolia - A 1st Crusade Scenario

Last night, I had to knock something together for the Lads. I had to do it in a hurry because painting commissions have been piling up of late - deadlines pending! Consequently, I decided to pull out an old favourite and do a 1st Crusade marching column scenario.  I've done several of these, all a bit different, and they always provide a definate set of victory conditions (the Franks must exit the appropriate table edge with X units), and something more to think about than 'kill the enemy'.
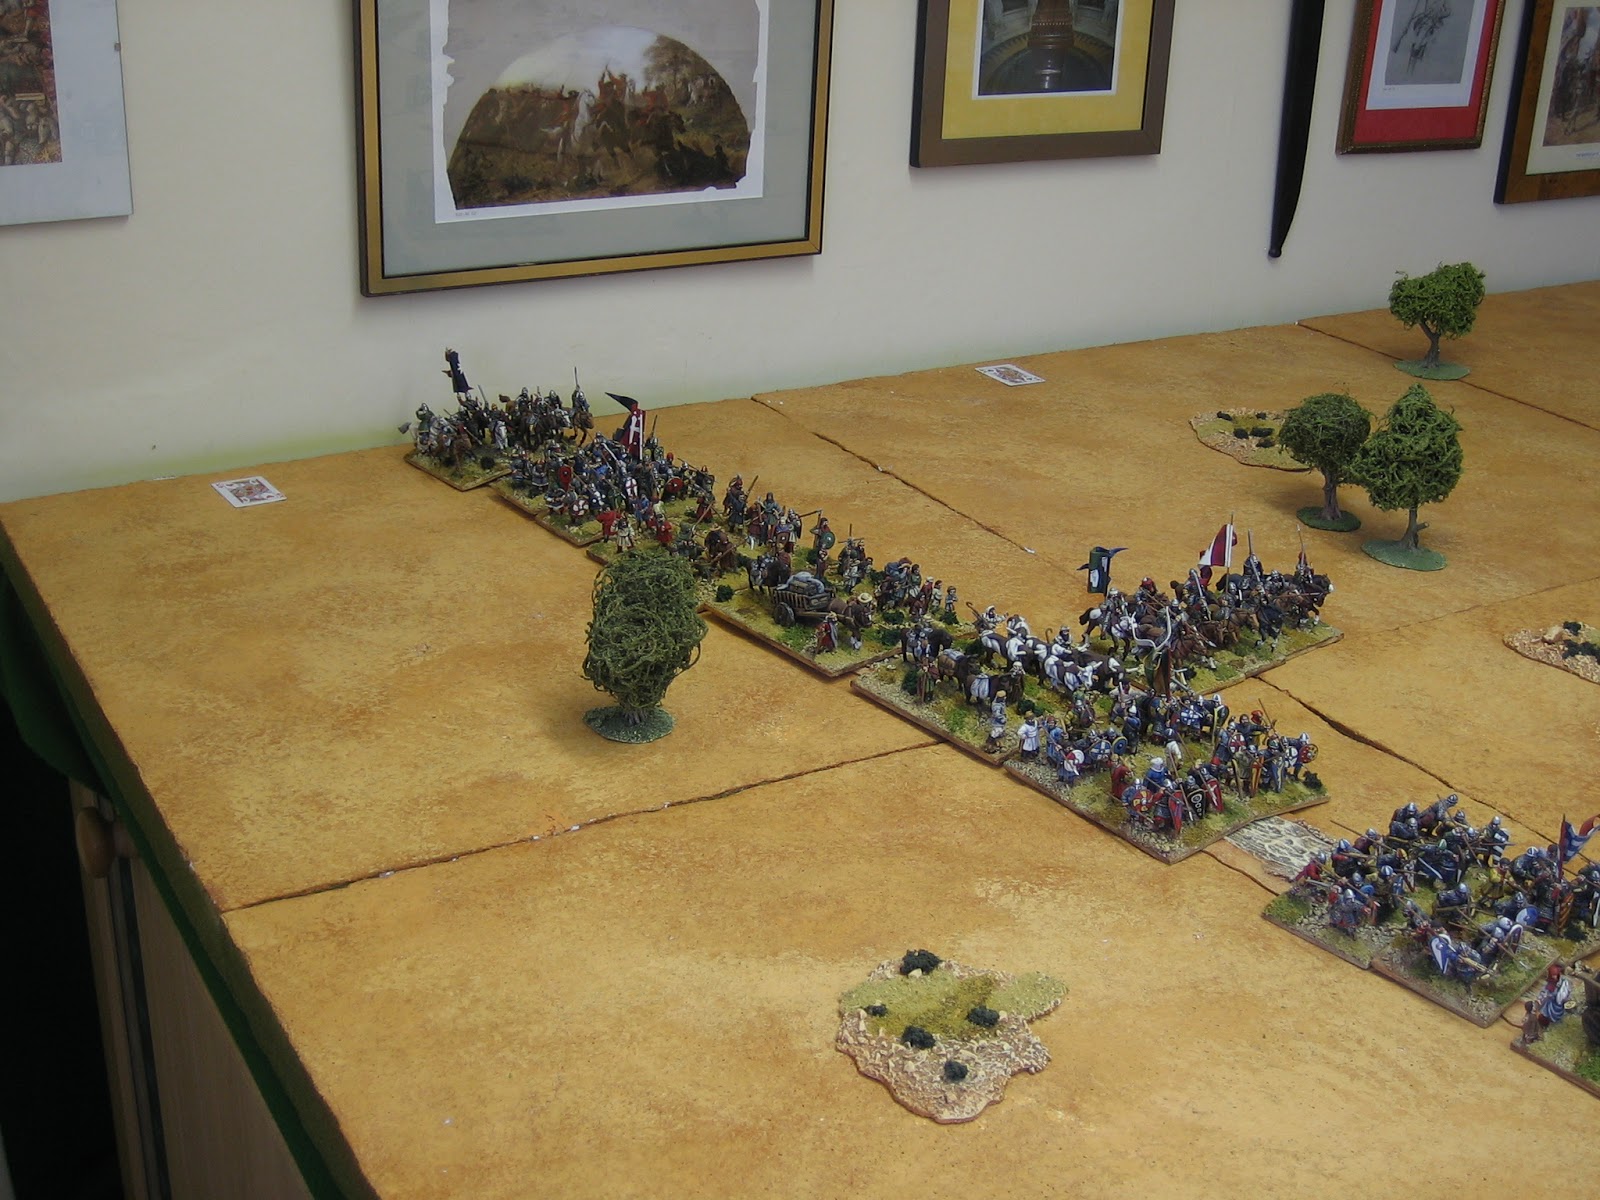
The scenario invloves the unwashed European masses marching through the wilderness on an ill defined road towards the Holy Land. Ahead of the column, an encounter with a caravan heading west is imminent. No Seljuk forces are deployed.

 The Christian vanguard. Two commands of knights and 'local' guides.
 The Christian mainward. A ragtaggle column of pilgrims, foot sergeants and knights.
The Christian rearward. More of the same.

You might have noticed the playing cards around the three edges of the table. The Seljuk player puts a numerically similar card by each of his three commands. They can deploy onto the table, on a march card, providing that they don't roll a 1. A 1 delays entry until the next turn. The two entry points at the rear of the Frankish column (K and Q) cannot be entry points until turn 2. Due to the vagueries of the FoB system, the caravan was added as a scenario fail safe. It is a trap; hidden amongst each caravan unit is a unit of Ghazis. They have been added as a speed bump.  The caravan moves and acts on Frankish cards until it is in combat, or deploys as into its parts, when it joins the Seljuk sequencing.

Anyway, last night the game got underway:

 Arrivals, the Seljuks are here!
 Thousands of 'em.
 The advance of the van is blocked.
 The caravan scatters, getting in the way of everything (umpires choice!).
 You never expect the Village People. Though to be fair, Peter did.
 But, they are not as hard as they look.
Knights charge, the Seljuks falter - the Seljuk King is killed.

 Turn 2. At the rear of the column, more Seljuks arrive.
 The battle is now in two parts. A battle at the head and tail.
A shot of the action at the end of night one. Proving, if nothing else, that Frankish pilgrims will always plough the fields and scatter.

Next week the action will continue

A Demo Game for Fiasco: Harran 1104 AD

Here is the Ilkley Lads game for Fiasco 2011. To save on wasteful handouts, which get picked up and not read, or which due to printing costs rarely cover the game in enough detail, the Ilkley Lads games that have been given to me to organise will come in this format. A couple of pamphlets containing the information here will be available to read at the table on the day. Alongside the pamphlets will be a stack off address slips for this site - simples innit.


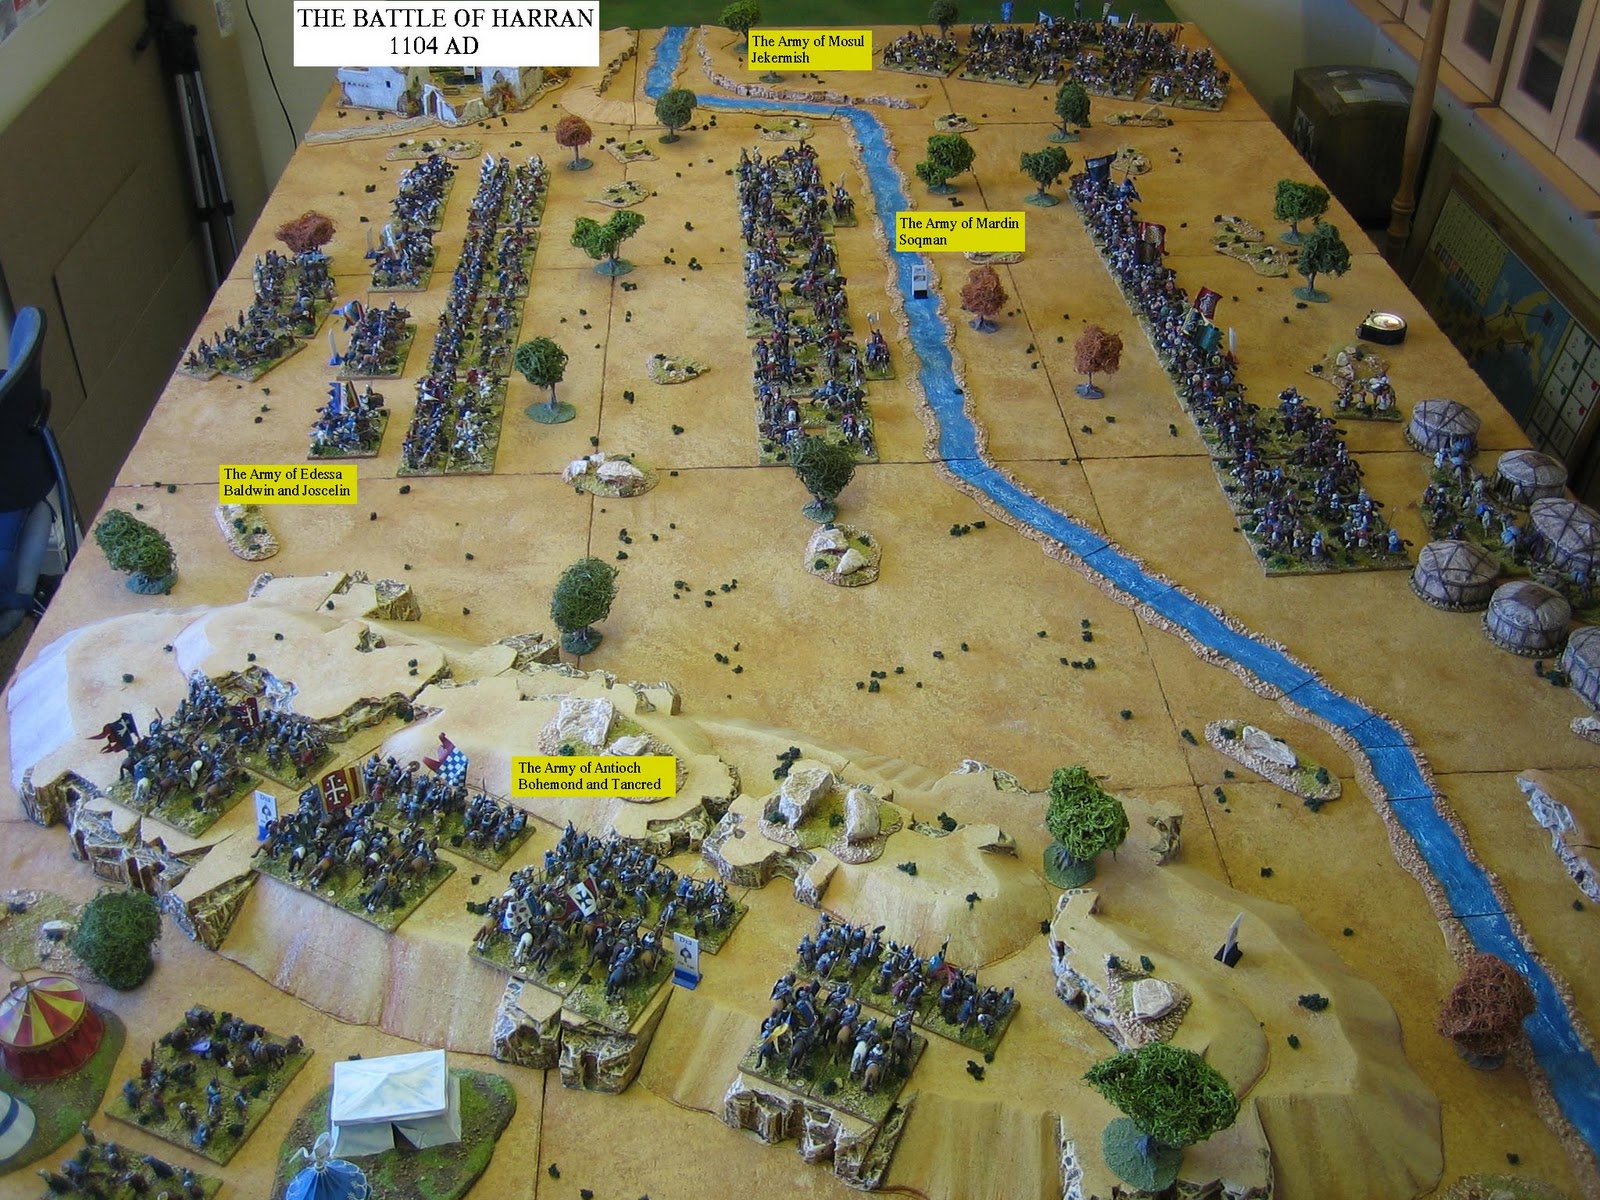
The Strategic Positions

Following the release for ransom of Bohemond of Antioch in 1103 AD the northern Franks celebrated by launching two offensives. The first was against the region around Alleppo from which they extracted tribute to pay back loans made for Bohemond’s ransom. The second was against the Byzantines who were trying to reclaim the Cilician territories to the northwest.

In the spring 1104 the northern Franks felt secure enough to turn against the Moslem states to the east. Their strategic goal was to take the mighty fortress of Harran. If this could be taken it would cut communications between the Moslems of Syria and the Moslems of Iraq and Persia. In March they began to raid Harran, and it became clear to the surrounding Moslem states that it was only a matter of time before the Franks besieged the place.

1103 AD had been a time of division for the Moslem world. The Seljuk Sultan Barkiyarok and his brother Mohammed had been at war. Peace was made between them by the division of territory in January 1104 AD; but it was an uneasy arrangement that suited no one. Following the death of Kerbogha of Mosul, Soqman the Ortoqid prince of Mardin had failed to gain the succession (he had backed the wrong horse in the civil war) and was at war with its newly appointed Seljuk atabeg Jekermish.

Harran, independent of Mardin and Mosul, was in a state of turmoil following a successful uprising against its general called Qaraj. His successor Mohammed of Isfahan was murdered by a servant called Jawali; a former page of Qaraj with whom Mohammed had become unwisely intimate. Jawali’s succession was weak and he was incapable of governing and protecting Harran effectively. When Frankish raids against Harran’s fields and trade routes began in the spring of 1104 AD he was in no position to counter them.

Harran was vital to the security to both Mardin and Mosul; Soqman of Mardin and Jekermish of Mosul quickly made peace and, patching up their differences, launched a counter offensive against Edessa to save it.

Hearing news that the Moslems were massing 70 miles from his capital, Baldwin of Edessa sent for help to his lieutenant Joscelin of Turbessel and Bohemond of Antioch. They would beat the Moslems to the punch by marching on Harran immediately. The armies concentrated before Harran and had they stormed the place immediately it would have fallen easily. But the Franks wanted the place intact and they quarrelled over whose flag would fly above its walls once it had been taken. Before the argument had been settled the combined armies of Soqman and Jekermish had swung south and were upon them; this move forced the siege to be broken. The battle that followed would take place across the river Balikh (the exact location of the battle is unknown, but it is certain that it took place some distance from Harran itself).

The Battle

The battlefield was split north to south by the river Balikh. The river was fordable along its entire length, though the banks were muddy in places. To the south west (the Frankish side of the river) lay a large hill. All of the surrounding ground was gently undulating scrubland strewn with bushes and stunted trees; this did not hamper movement, but goes someway to explaining why visibility was hindered.

The Frankish plan of battle was cunningly simple. The Edessans would hold the open ground in the centre / centre left and draw the Saracen into a close quarter fight. Once the Saracen was entangled, the Antiochenes would emerge, from their ambush position, over the brow of the hill (right flank) and crush the Saracens from flank and rear.

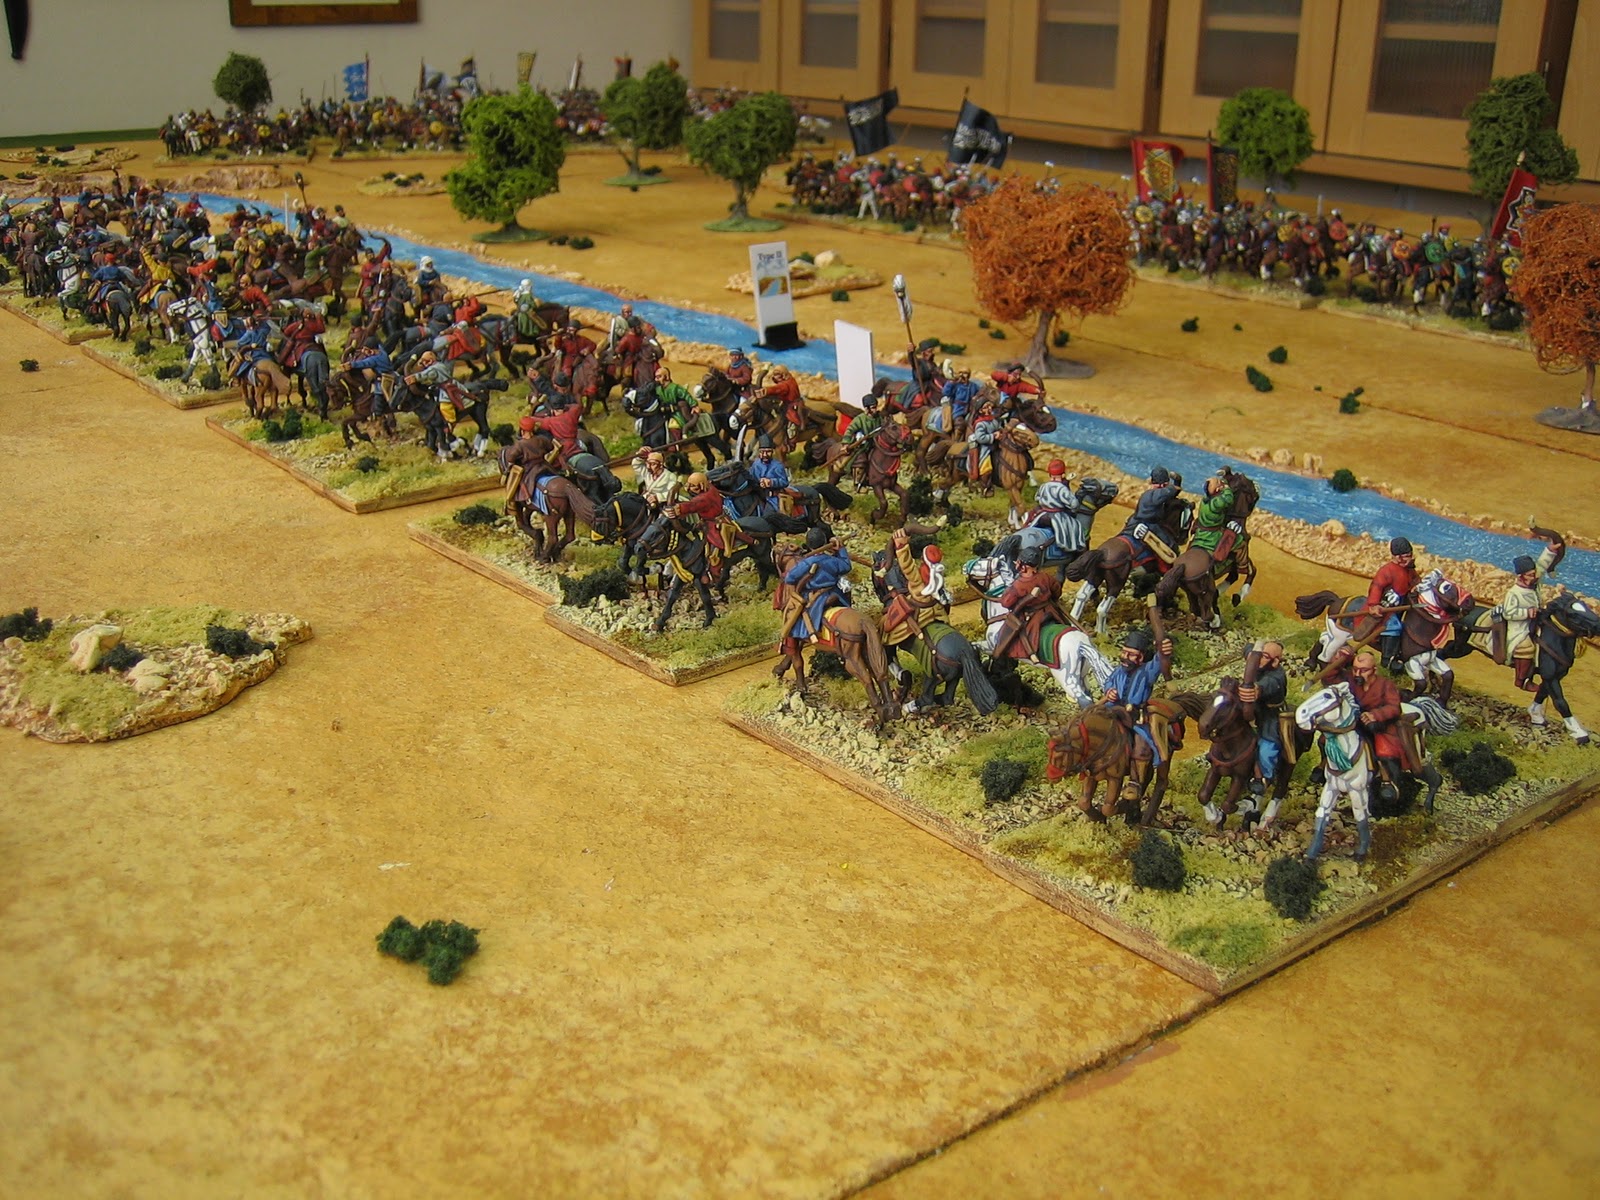
The Moslem plan was somewhat similar. Firstly, Soqman’s Turcoman cavalry would engage with the enemy then feign flight back across the river. If the plan was successful the Franks would be drawn into pursuit and then crushed by fresh cavalry set in ambush on the Moslem side of the river.

As it was, the Saracen’s plan succeeded and the Frank’s plan failed. On seeing the Turcoman horse archers fleeing the Edessans thought the battle won and fell into pursuit. Once they had crossed the river thousands of fresh cavalry fell upon them from all sides and they were utterly destroyed and their leaders captured.

Bohemond’s Antiochenes did not even enter the fight. On cresting the brow of the hill, brushing away some light resistance as they did so, they saw the slaughter of the Edessans in the plain below; Bohemond ordered a retreat.

General Scenario Notes

I have devised this scenario to be played with Ager Sanguinis rules by James Roach published in Miniature Wargames in January 2009 issue 309 (with some later unpublished amendments, most of which come from the development of Ager Sanguinis Punic Wars to be published later this year).

The terrain and the forces should be deployed as per the deployment photograph. The forces of Jekermish and the Antiochenes (Bohemond and Tancred) are deemed to be ‘invisible’ to all other forces until they move, shoot, or are discovered. The Antiochenes will only be discovered if Soqman sends troops to reconnoiter from the hill’s summit. The troops from Mosul (Jekermish) will be discovered by the first Frankish unit to cross the river.

Edessa and Antioch

The combined strength of the two armies was put at more than 3,000 cavalry and 9,000 infantry, including many Armenian subjects from the Edessa region. By stripping every garrison of available men it represented almost the entire fighting strength of the northern Franks. For this battle, and using my own units, my figure ratio was roughly 1: 40.

Army Die: D10; Army characterization: 7 cards; D10 sequence deck with one Stratagem card.

Army of Eddessa

Baldwin (Motivation Die: D10): 1 small unit of Knights, 1 unit of turcopoles, 1 unit of Frankish sergeants, 1 unit of Armenian spearmen, 2 units of Armenian bowmen.
Joscelin (Motivation Die: D10): 2 small units of ‘Armenian’ Knights, 1 unit of Frankish sergeants, 1 unit of Armenian spearmen, 2 units of Armenian bowmen.


Army of Antioch
Bohemond (Motivation Die: D12): 2 small units of Knights, 2 units of Frankish sergeants.
Tancred (Motivation Die: D12): 2 small units of Knights, 2 unit of Frankish sergeants.

The Antiochene ambush

Add a ‘Stratagem’ card to the army’s sequence deck: On the appearance of this card the Antiochenes, providing their position is not known to the enemy, can make a triple move as per ‘Move’ card counting it as ‘even’. For the remaining initiative pips in their phase, any enemy unit they contact may not evade, and, where required, any ‘Tactical Advantage’ cards can be used in place of a melee card for a single melee resolution. Its use represents a perfect ambush. Remove after use or the Antiochenes are discovered.

Mardin and Mosul

The best guess at Saracen numbers is 10,000, all of which were cavalry. I have seen certain accounts that break down this figure to 7,000 from Mardin and 3,000 from Mosul, but I have chosen to go with Steven Runciman (A History of the Crusades 2. The Kingdom of Jerusalem) who states “Soqman with a considerable force of Turcoman light cavalry and Jekermish with a slightly smaller force composed of Seldjuk, Turks, Kurds and Arabs.” In game terms this works much better. For this battle, and using my own units, my figure ratio is roughly 1: 40.

Army Die: D12; Army characterization: 6 cards; D10 sequence deck with two Stratagem cards:

The Army of Mardin
Soqman (Motivation Die: D10): 2 units of Ghulam cavalry, 1 unit of Arab heavy cavalry, two units of Turcoman horse archers and 1 unit of Bedouin.
2 Tribal leaders (Motivation Die: D10): Each with 3 units of Turcoman horse archers.


The Army of Mosul

Jekermish (Motivation Die: D10): 1 unit of Ghulam cavalry, 2 units of Arab / Kurdish heavy cavalry.
1 unnamed leader (Motivation Die: D10): 4 units of Seldjuk horse archers.


Turcoman feigned flight
 Add two ‘Stratagem’ cards to the army’s sequence deck: On the appearance of this card, Soqman’s two Turcoman command groups deployed beyond the river may attempt to lure the Edessan commands into an uncontrolled advance.

To attempt feigned flight, one unit from each Turcoman command must move (up to 16”) to contact with a unit of each Edessan command. Roll D8 [Turcoman] Vs D10 [Edessan].

If the Turcoman roll is higher all Turcoman units immediately make a rout move towards, and possibly across, the river. The Edessan units become vexed and must pursue the enemy until they contact an enemy unit or they are rallied: Leaders not in pursuit rally with a Down 1 modifier; leaders in pursuit rally with a Down 2modifier. Turcoman horse archer units in feigned flight count as routed except that when rallying they do not count the down 2 routing modifier and they may be rallied by Soqman as well as their own tribal leader. Any unit in feigned flight that is contacted by the enemy is properly routed.

If the Turcoman roll is equal or lower the Turcoman unit becomes embroiled with its target and must remain in contact.

Figures

All figures (except for 24 ‘Arab’ foot archers by Renegade Miniatures) are Perry Miniatures from their First Crusade range. All figures were painted by James Roach of Olicana Painting Services using Humbrol enamels. All figures are based on 4mm ply wood. Infantry bases are 60mm x 60mm. Cavalry bases are 60mm x 90mm.

Terrain

The table is 10 feet by 6 feet. Terrain tiles are the reverse side of tiles by TSS painted with household emulsion (shades of Dulux Whole Meal Honey). Trees are by Last Valley. Hills are home made. They are constructed from high density polystyrene insulation board. All other terrain is scratch built.

The Ilkley Lads

The Ilkley Lads are an informal group of ‘40 and 50 somethings’ operating out of various private addresses in Ilkley West Yorkshire.

Ghazzan - Which one girl with beard?

We Finished the battle of Ghazzan last night. A crushing victory for Gudrupee the Malik of Fob. The more regular Frankish troops where routed or slaughtered defending the hill whilst their less martial element looked on from the gardens, vineyards and orchards below. After the battle, every harem slave merchant within 200 miles licked his lips - "Which one girl with beard?".

Here are some shots of the battles conclusion.


Parable of the Holy Turnip - part 2.

Some images of the battle with selected extracts from the Chronicles of Kermit the Hermit.


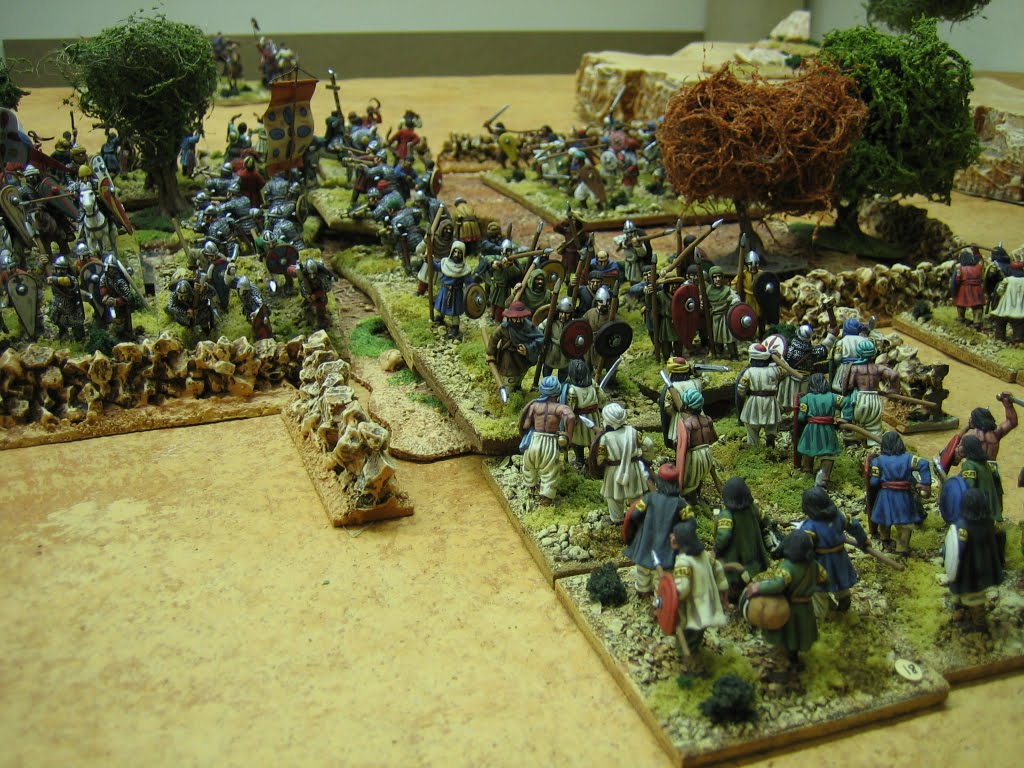
"......At first the attacks by the wild Saracen were beaten off, but maddened by the reverse they did attack again with renewed and bloody vigour. The turnip fields fell but were then retaken, the Holy Turnip held aloft in triumph........."

"....whilst the pilgrims battled for their very lives in the ditches of Blakadah, Lord Flashart did charge on those Saracens holding high ground above the enemy camp and there, heavy loss not withstanding, did great massacre....."
".........As the light of day waned there did arrive more Saracens above the valley. But their arrival availed him little........."

"..........As darkness fell, the Saracen retreated to his camp and the Christians back to Blakadah. In the morning the Saracen was gone........."
This game was a belter, with both sides fighting each other to a bloody standstill. The Christians were at zero morale for much of the latter part of the game but passed every army morale test they took - five from memory - and rolling D10 Vs D10 this was outstanding. A draw was decided at 11pm, though the Christians might with some justification claim a marginal victory.

I will revisit the scenario notes later this week and make some adjustments to it. The Christian's objectives and some Saracen deployments will be changed to make the scenario flow better - the original was written in an afternoon. I'll do this by edit so it will not appear as a new posting.

My Early Crusades Books


I'm a member of quite a few groups and forums and one question that often crops up on forums is "What further reading.....?" So I'm going to list the books I have on my chosen periods, each with a very brief appraisal - now when I reply to the question I can simply post a link! I'll start with the books I have on the Crusades. My main interest is the 1st and 2nd Crusades (as that is what I have figures for) and the list reflects this. I'll update as new books are acquired.

A History of the Crusades (3 Vols) - Steven Runciman. [The best history of the Crusades in English.]
The Art of Warfare in the Middle Ages 378 - 1278 - Charles Oman. [Who could be without?]
The First Crusade - Thomas Ashbridge. [A good general history.]
Crusades - Terry Jones and Alan Ereira. [A brief history and a good 'choosing sub period aid'.]
The Wars of the Crusades - Terence Wise. [A sound military history.]
Battles of the Crusades 1097 - 1444 - Various authors. [This is a big, coffee table, 'battle book'. It covers 20 battles in its 224 pages.]
Warriors of God - James Reston, Jr. [History of the 3rd Crusade.]
Dungeon, Fire and Sword - John J. Robinson. [The ripping yarn of the Templars - a page turner.]
Byzantium, The Decline and Fall - J. J. Norwich.
Crusader Warfare (2 vols) - David Nicolle.
[Essential wargamers' reading.]
Crusading Warfare 1o97 - 1193 - R. C. Smail. [Essential wargamers' reading.]
A Wargamers' Guide to the Crusades - Ian Heath. [Title says it all.]
Armies and Enemies of the Crusades - Ian Heath. [Wargames Research Group book. Excellent. Includes line drawings and descriptions of all known (?) troop types.]

Plus the Ospreys [if you like that kind of thing - and David Nicolle]:

The First Crusade - David Nicolle
The Second Crusade - David Nicolle
Hattin 1187 - David Nicolle
Saladin and the Saracens - David Nicolle
The Crusades - David Nicolle
Knight Hospitaller - David Nicolle
Saracen Faris - David Nicolle
Byzantine Armies 886 - 1118 - Ian Heath
Armies of the Crusades - Terence Wise

Crusades Campaign - The Isle of Fob

Peter J and I are about to start a fictional Crusades Campaign. We will be using Ager Sanguinis Rules to fight the table-top encounters, and an Ager Sanguinis / Theatre of War (Piquet) hybrid set of rules for the map moves etc. The hybrid campaign rules are currently available from the files section of the following Yahoo Groups under the title 'Isle of Fob Campaign'; as are Ager Sanguinis Rules for early Crusader warfare:

http://games.groups.yahoo.com/group/Piquet/

http://games.groups.yahoo.com/group/shatteredlances/

The photos are from a recent (not campaign related) game, hurriedly thrown together, that Peter and I fought out (Crusader victory) a week or two ago.

Background:
From the Chronicles of Kermit the Hermit........

….In the summer, in the year of our Lord 1110, sore pressed by incursions on his northern borders by Asiatic hordes, the Emperor [Byzantine] withdrew armies and garrisons from quieter parts of the Empire to meet the threat. This was folly for, in leaving the Isle of Fob unprotected, he invited the attention of divers Seljuk princes.

The Isle of Fob is not, in truth, an isle. It is a large tract of land connected to the mainland by an isthmus that borders the lands of the Hashishmendid Seljuks. No sooner had the garrisons left the Isle the Seljuks, led by a certain Emir called Gudrupee, crossed the isthmus and occupied Chiosus. It was late in the year and here Gudrupee encamped for the winter and declared himself Malik of Fob. On promises of land, wealth and the Glory of Allah his army was swollen by reinforcements in readiness for the campaigning season.

Fearing for his cherished Isle the Emperor was at a loss, for in sending troops there he must give up another cherished part. Then fortuitous help came to him. A Crusade, led by Louis of Chernobil, was on its way to Jerusalem and was at that very moment passing through the western borders of his lands.

It has long been known that the Isle of Fob is a blessed place; for it was to here that our Lord’s Cup was taken and hid in one of the many monasteries. The Emperor, being both wise and cunning, let it be known throughout Christendom that this Blessed Relic would surely fall into the hands of the heathen if left unchecked.

At once, the Patriarch of Jerusalem hurried to intercept the Crusade and, with the aid of the Emperor’s fleet, diverted Chernobil and his followers to the Isle of Fob. Chernobil and his followers landed at Lampron and, on Christmas Day, entered the town.

But now the Emperor’s plans became untied. Betraying the Emperor, the Crusaders crowned Chernobil King of Fob and set to plan conquest of the Isle for themselves.

Thus the scene was set for the bloody War of Fob………

Campaign start: Campaign turn 3, Spring.

The campaign Map

The Ilkley Lads and I will also be at the York show on 7th Feb 2010 - doing a Crusades game. Drop by and say hello.

James


Search This Blog

Popular Posts